
R users have been complaining about the package version control for a long time. We admire python users, who can use simple commands to save and restore the packages with correct versions.
The good news is that, RStudio recently introduced renv package to manage the local dependency and environment, filling the gap between R and python. renv resembles the conda / virtualenv concept in python.
Compare with Python
There are a lot of similarities between renv and python virtual environment.
| task | R with renv | Python with conda | Python with pip |
|---|---|---|---|
| create the environment | renv::init() | conda create | virtualenv |
| save the environment | renv::snapshot() | conda env export > environment.yml | pip freeze > requirements.txt |
| load the environment | renv::restore() | conda env create -f environment.yml | pip install -r requirements.txt |
Installation
The latest renv version is 0.11.0 in CRAN, dated by July 19, 2020.
# install from CRAN
install.packages('renv')
Usage
The general workflow can be summarized as following:
1. initialize the virtual environment
renv::init()
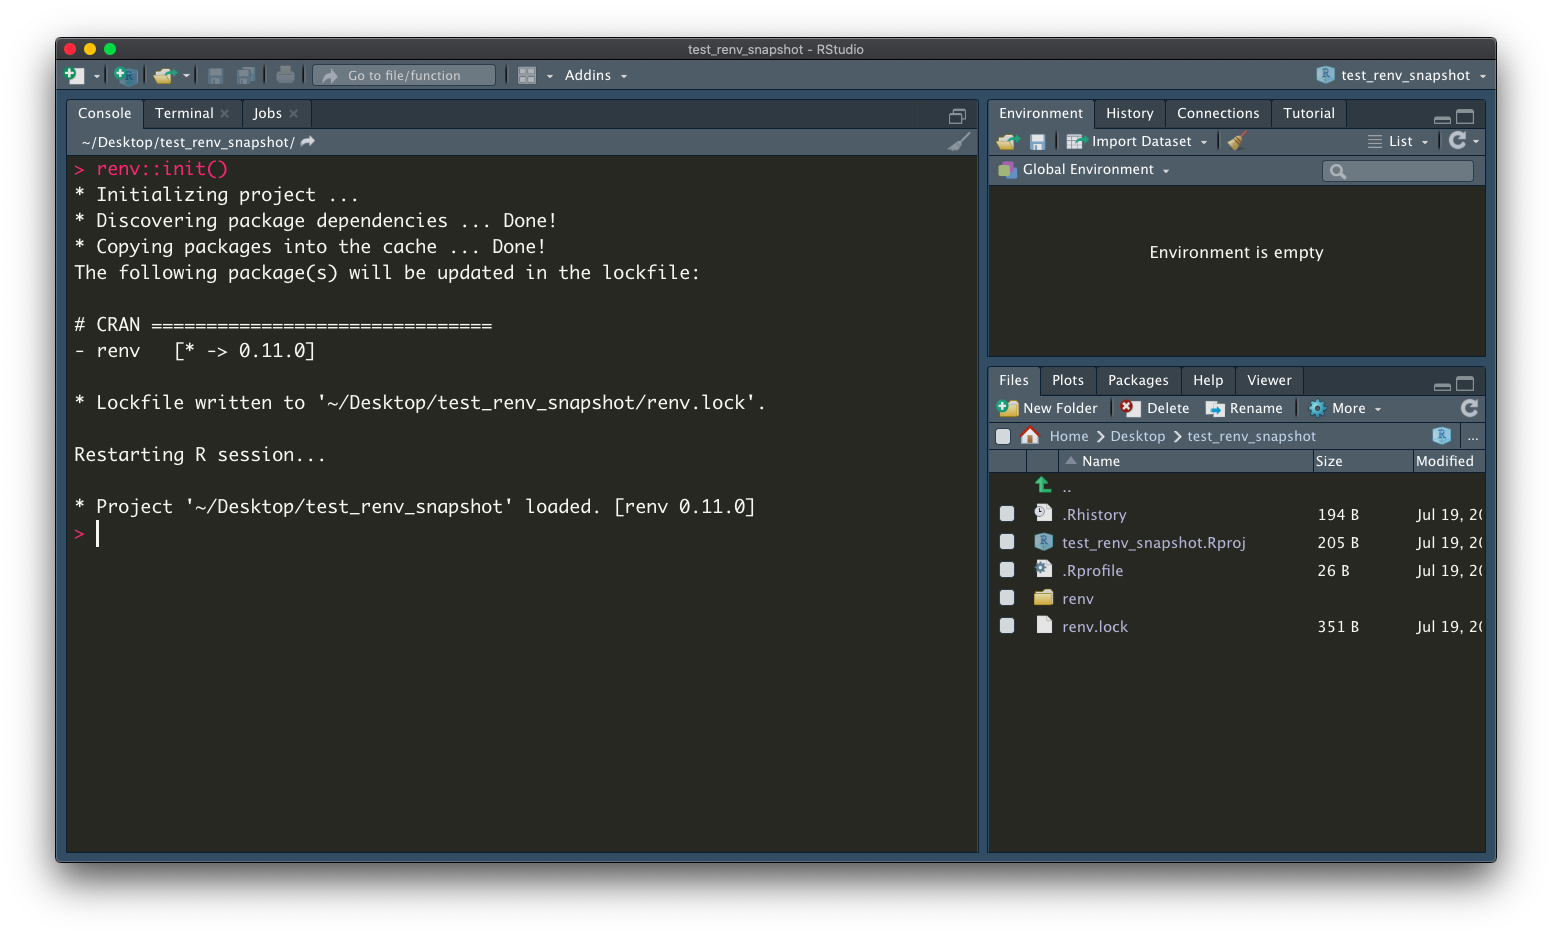
After calling the function, several elements are initialized in the project folder:
renvfolder where packages are savedrenv.locka json file stores the R version, packages detail..Rprofilea source command to activate the environment when the project opens
For example, if we need to install glue and digest package with specific version from CRAN and Github, we can still use install.packages or renv::install function from renv.
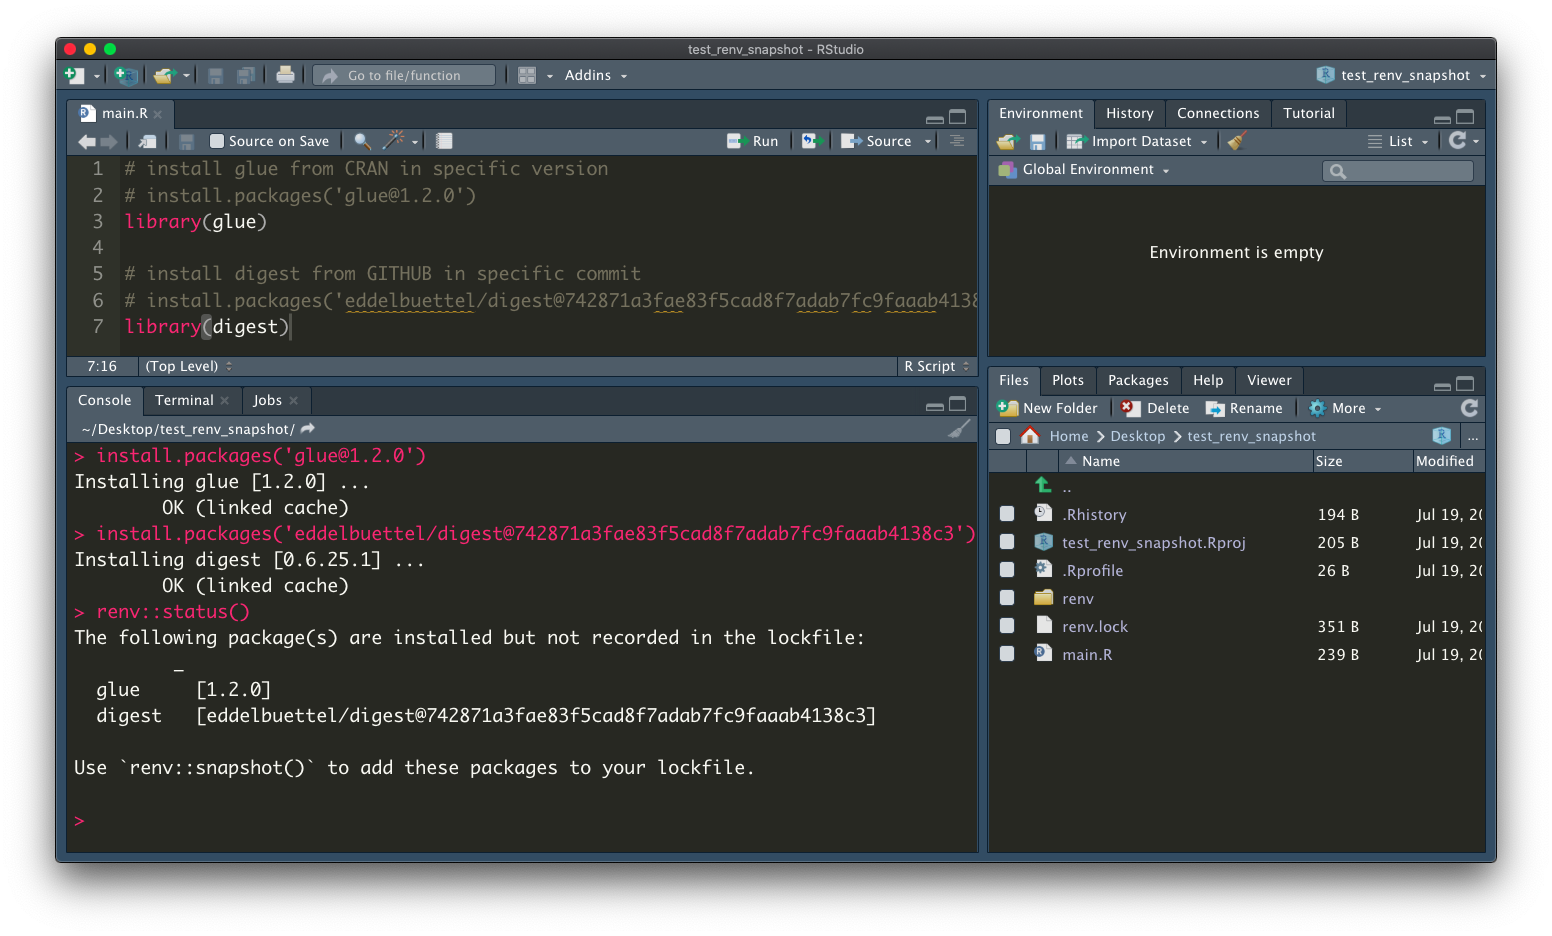
Let’s call renv::status() to check the required packages which are changed, according to the package dependency in your R scripts. Because we library these two packages in our main.R, renv reminds us these two packages not recorded in the renv.lock file.
2. save the packages into renv.lock
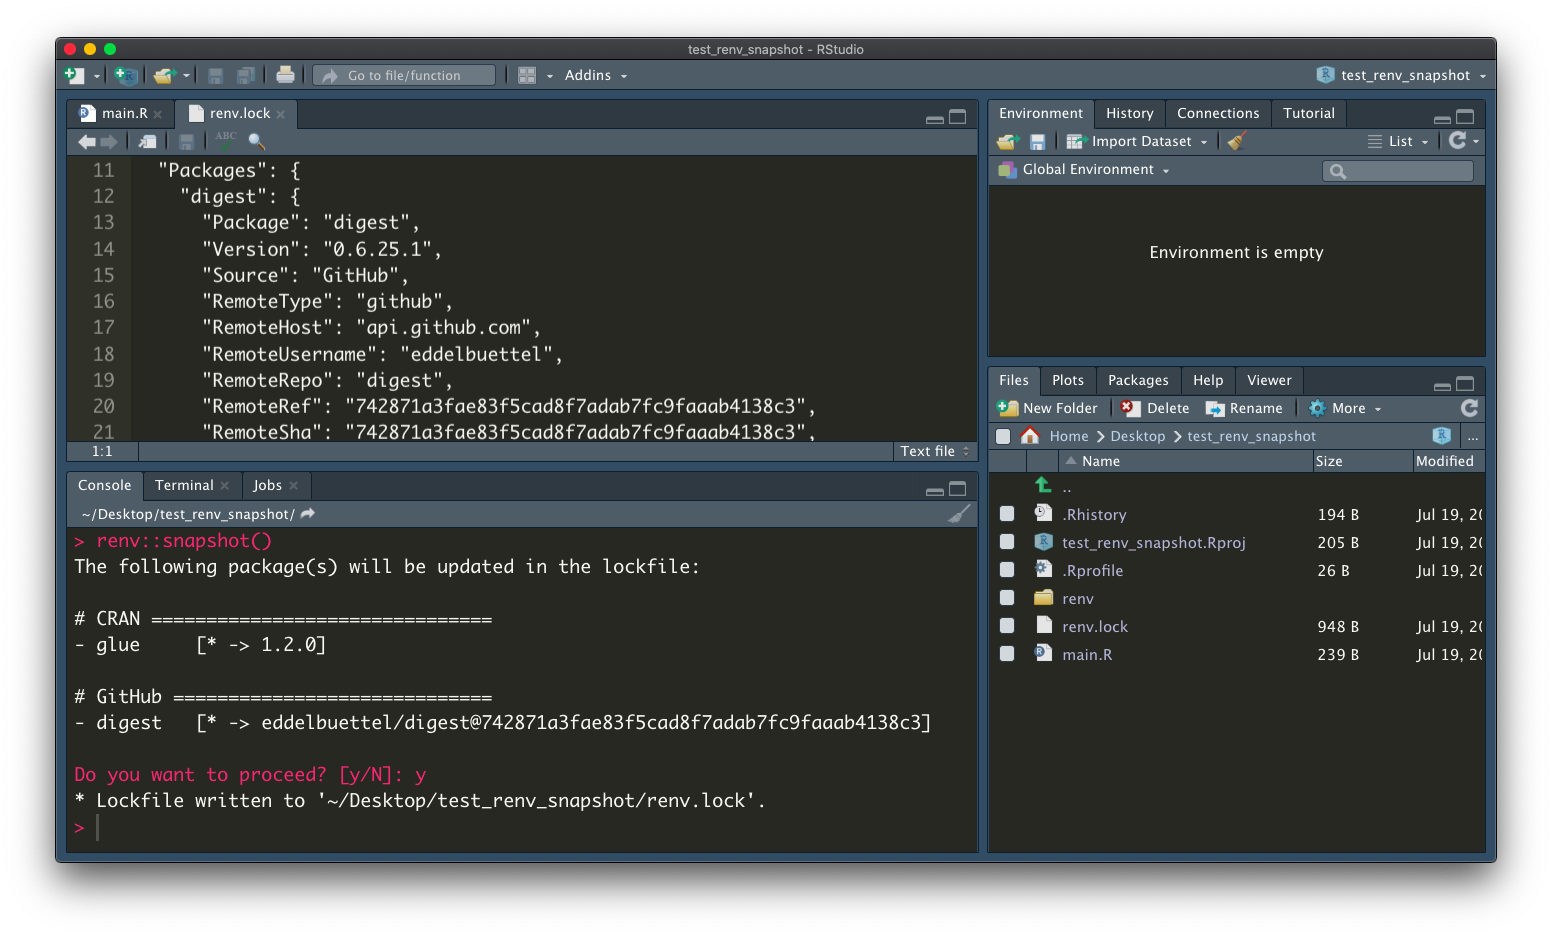
renv::snapshot()
Whenever we want to save the package information into renv.lock, we can call renv::snapshot().
When the code development is done, we can pass the renv.lock file together with the R code to others for collaboration.
3. load the packages from renv.lock
When the others get the renv.lock file and try to reproduce the development environment, this can be done by following:
# if `renv` is not created yet, using
renv::init()
# if `renv` is already created, using
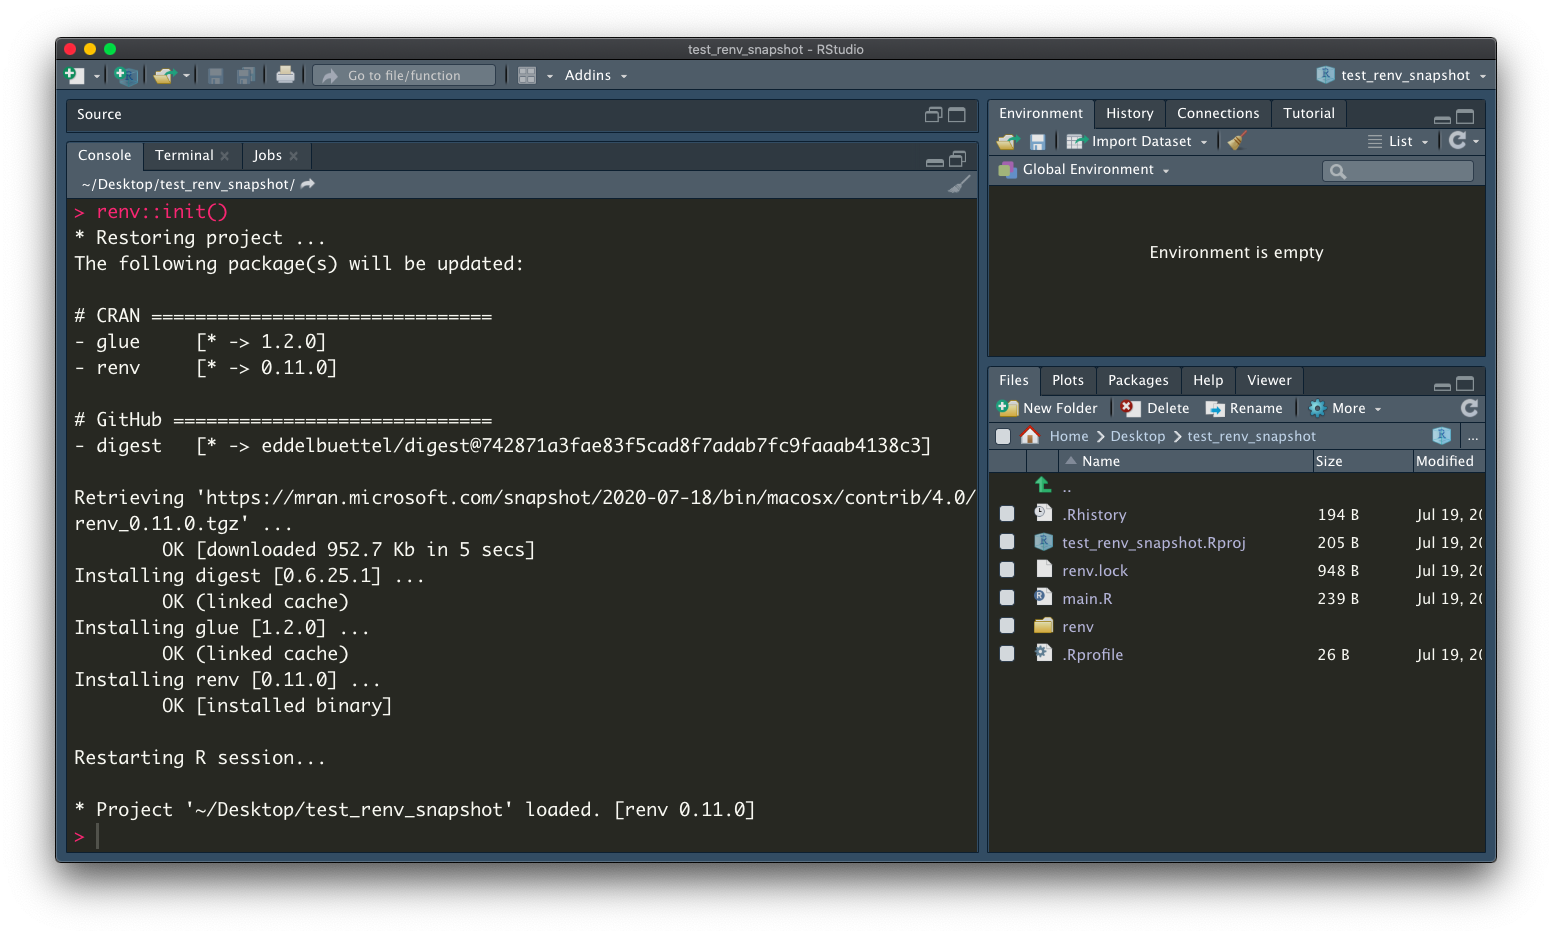
renv::restore()
Work with Docker
Prior the introduction of renv, when we want to containerize R code with docker, we need to create a separate R code which lists all the install.packages commands. Now we can just conveniently call one line of code.
The official document recommends two methods of using renv with docker
pre-bakedmethod: restore packages when docker image built, but can’t use the cached packages and the image building will be slow.cached-mountedmethod: build the docker image without installing packages, and then mount the cached package library to install the cached packages.
I personally still prefer the 1st method, even though it’s slower.
Let’s create a folder call test_renv_restore and copy the renv.lock and main.R from previous folder. Then create a Dockerfile as below:
FROM rocker/r-base:4.0.2
# install renv package
RUN Rscript -e "install.packages('renv')"
# copy everything to docker, including renv.lock file
COPY . /app
# set working directory
WORKDIR /app
# restore all the packages
RUN Rscript -e "renv::restore()"
# run our R code
CMD ["Rscript", "main.R"]
call the docker build using
cd ~/test_renv_restore
docker build -t renv .

renv makes the package management effortless and just one line of code solved the problem.
Reference
- Renv document: https://rstudio.github.io/renv/articles/renv.html
- Renv github: https://github.com/rstudio/renv/
